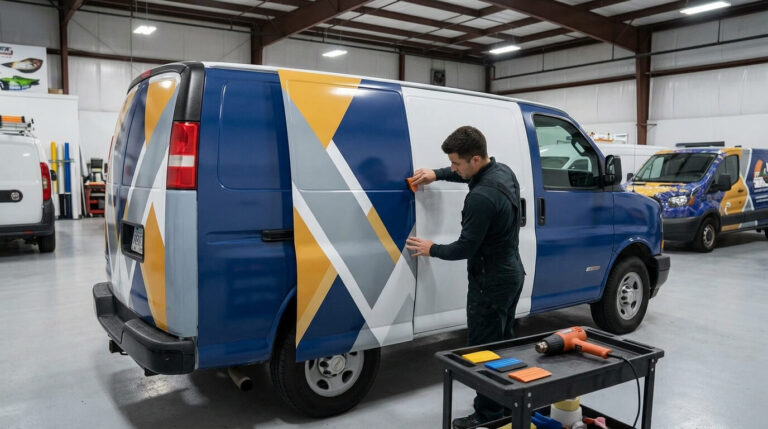
A damaged vehicle wrap does not always require a complete rewrap.
When damage is limited to one door, fender, bumper, or planned graphic panel, a wrap provider may be able to remove and replace that section. The result depends on the condition of the vehicle, age of the existing graphics, availability of the original material, production records, design, and acceptable color difference.
There are three basic repair approaches:
- Apply a small patch.
- Replace one complete graphic panel or vehicle component.
- Replace a larger section or the entire wrap.
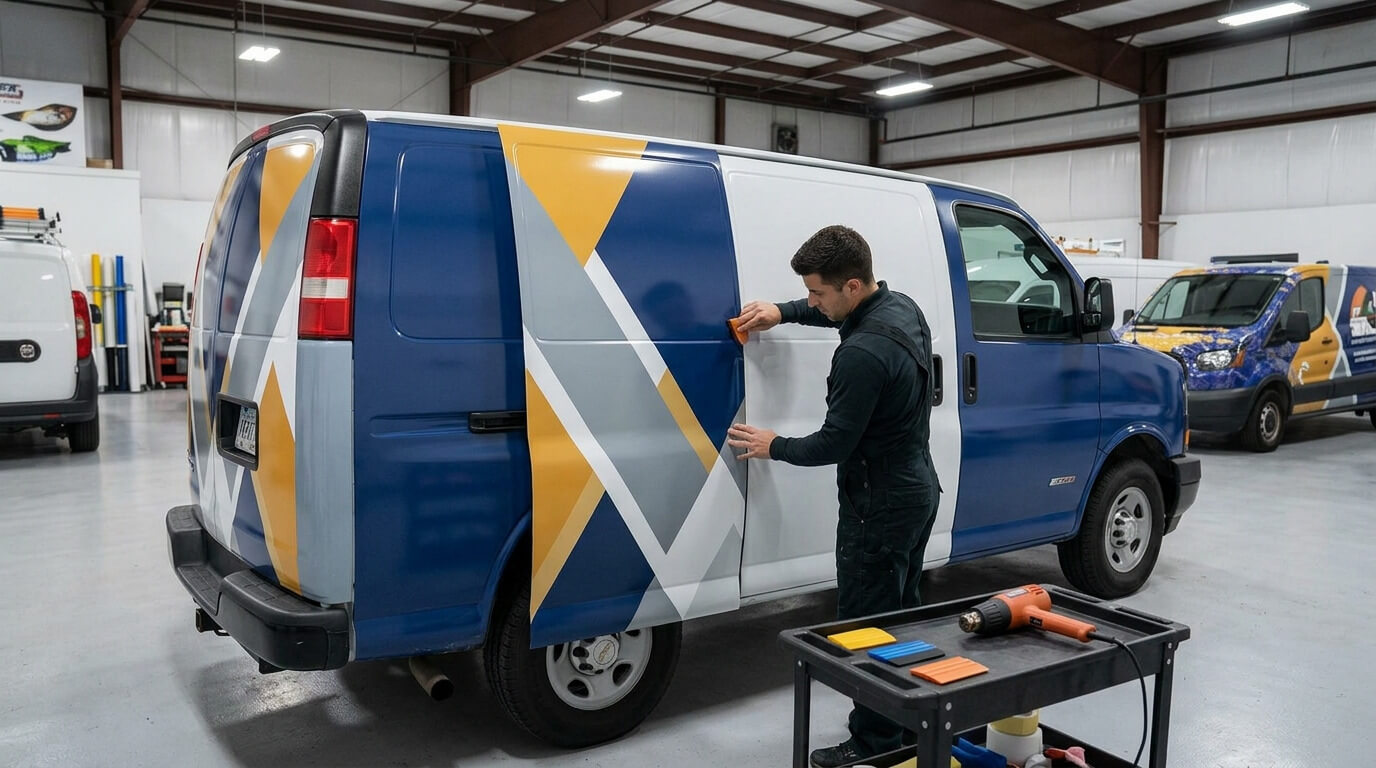
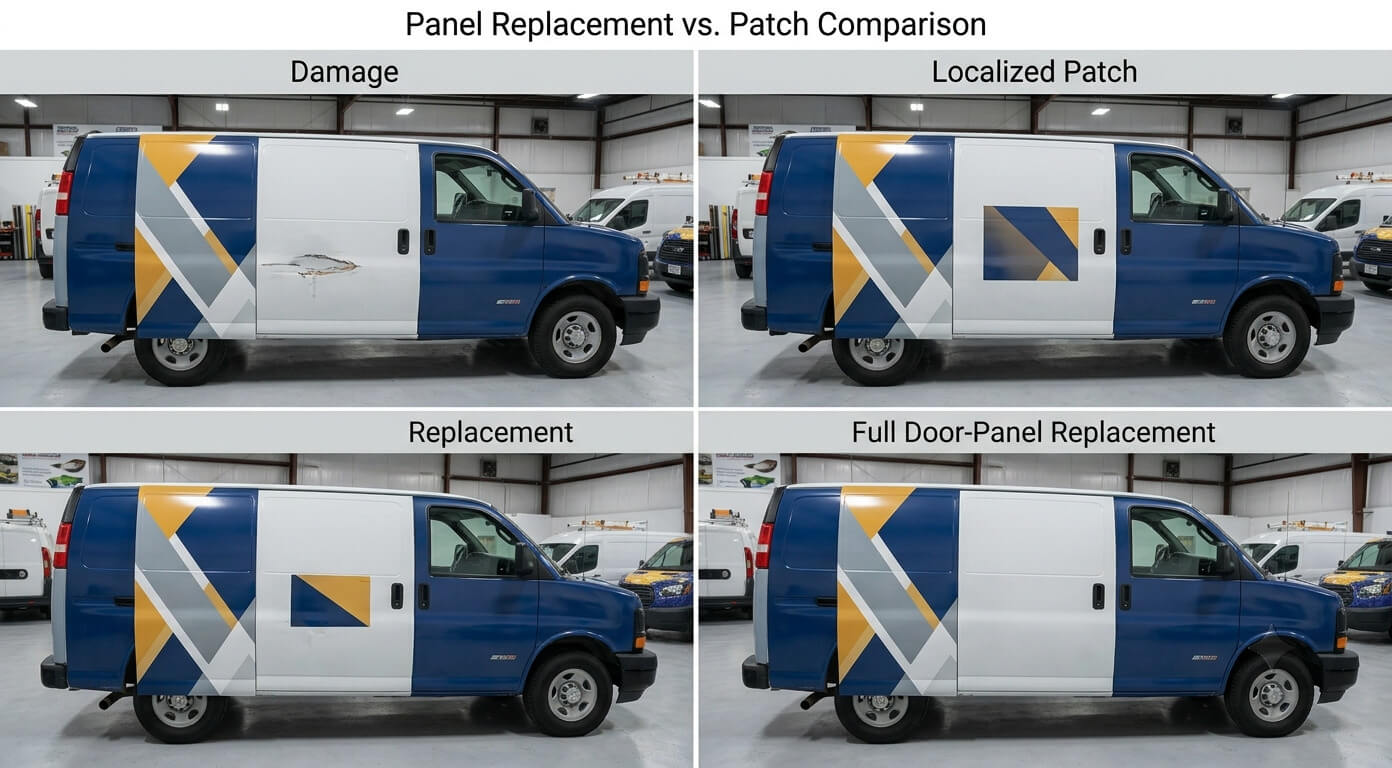
For most commercial fleets, replacing a complete logical panel produces a cleaner and more maintainable result than placing a small patch over the damaged area.
At Pixel Wraps, we inspect both the vinyl and vehicle before recommending the repair scope.
First Determine Whether the Vehicle Is Damaged
A wrap repair cannot be completed properly until the surface underneath is stable.
Damage may affect only the vinyl, or it may extend into:
- Clear coat
- Paint
- Primer
- Body filler
- Metal
- Plastic
- Fiberglass
- Door alignment
- Vehicle hardware
Vinyl-Only Damage
Examples include:
- Surface scratch through the laminate
- Small cut
- Lifted edge
- Localized abrasion
- Minor chemical staining
- Torn graphic with intact paint
- Small area damaged during loading
The vehicle may be ready for graphic repair after inspection and cleaning.
Vehicle Damage
Examples include:
- Dent
- Crease
- Deep scrape
- Paint loss
- Rust
- Cracked bumper
- Collision repair
- Misaligned door
- Exposed metal
- Damaged body filler
The vehicle should be repaired and refinished before new vinyl is installed.
Wrapping over an unrepaired dent or unstable paint will reproduce the defect and may create adhesion or removal problems.
Can a Small Patch Repair a Vehicle Wrap?
A patch is a new piece of vinyl placed over or within a damaged area.
It may be appropriate when:
- Damage is small
- The vehicle needs a rapid temporary repair
- The graphic is relatively new
- The design contains texture or detail that hides the patch
- The patch can be shaped intentionally
- Exact appearance is not the highest priority
- The surrounding film remains securely bonded
A patch can be more noticeable on:
- Solid colors
- Smooth gradients
- High-gloss finishes
- Dark graphics
- Eye-level panels
- Large uninterrupted backgrounds
- Older faded wraps
The patch creates additional edges that can collect dirt or become visible under side lighting.
For customer-facing commercial fleets, Pixel Wraps normally evaluates whether a full panel replacement would create a more professional result.
Why a Complete Panel Replacement Often Looks Better
A complete panel replacement removes the damaged vinyl to a logical boundary.
Possible boundaries include:
- Door edges
- Body seams
- Existing wrap overlaps
- Fender lines
- Graphic color changes
- Planned panel breaks
- Service-compartment doors
- Bumper sections
Replacing the full section avoids leaving a small shape in the middle of the original graphic.
It can also provide:
- Cleaner edge placement
- Better image alignment
- Fewer patch edges
- More consistent laminate finish within the repaired area
- Easier documentation
- A clearer future repair history
A new panel may still look different from the aged surrounding graphics. Complete panel replacement controls the repair boundary but does not eliminate color and gloss variation.
A New Print May Not Match the Existing Wrap Exactly
The original wrap has been exposed to:
- Sunlight
- Heat
- Rain
- Road salt
- Washing
- Air pollution
- Physical abrasion
- Cleaning products
- Normal laminate wear
The replacement panel has not.
Even when produced from the original file, the new graphic may appear:
- Darker
- Brighter
- Glossier
- More saturated
- Cleaner
- Slightly different in hue
3M’s wrap guidance warns that a replacement section may look different because of factors including material-lot variation and changes in color or gloss on the previously installed film.
See the 3M Wrap Shop Questions and Answers.
This guidance refers to 3M wrap film, but the underlying issue also applies to printed fleet graphics: new material is being compared with an aged installation.
Material Lots Affect the Match
Professional manufacturers control color and film production, but slight differences can exist between material lots.
For printed wraps, the media’s:
- White point
- Surface
- Adhesive opacity
- Finish
- Print response
can influence the final color.
For solid-color wraps, the film itself provides the visible color, making lot consistency especially important.
The original material lot may no longer be available when a repair is needed months or years later.
Production records cannot recreate an old lot, but they help identify the correct product and explain possible differences.
The Original Film or Laminate May Be Discontinued
Vehicle-wrap product lines change.
A manufacturer may:
- Update the adhesive
- Replace the product
- Change the laminate recommendation
- Discontinue a finish
- Change available roll widths
- Introduce a new film generation
If the original construction is unavailable, the provider must determine whether a current replacement is sufficiently compatible.
A different laminate can change:
- Gloss
- Texture
- Contrast
- Color appearance
- Conformability
- Thickness
When no suitable match exists, replacing a larger logical section or the complete wrap may produce a more consistent result.
Printing Equipment and Profiles Can Change
The original graphic may have been produced with:
- A different printer
- Older printheads
- A different ink lot
- A previous media profile
- Different RIP software
- Different curing settings
- Another production environment
Pixel Wraps can use archived artwork and production records as a starting point. We may also print and laminate test samples for comparison with the actual vehicle.
An old digital proof is not a sufficient color standard. The vehicle’s current graphics must be inspected.
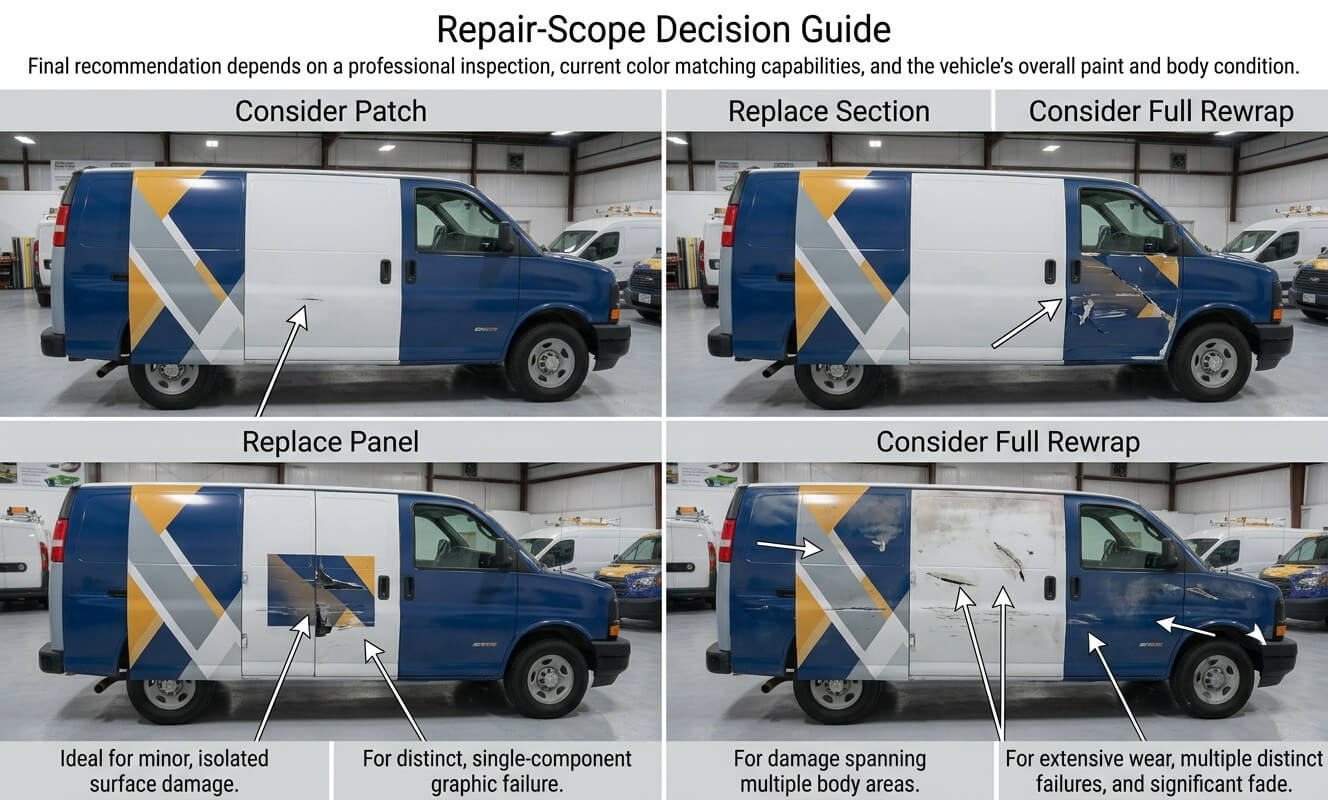
When One Section Is Usually Repairable
A targeted replacement may be practical when:
- Damage is limited to one vehicle component
- The paint underneath is stable
- The original artwork is available
- Film and laminate can be identified
- The existing wrap is still in good condition
- A natural panel boundary exists
- Color variation is acceptable
- The remaining wrap has meaningful service life
- The repair does not cross several connected graphic areas
Typical repairable areas include:
- One cargo-van door
- Fender
- Hood
- Tailgate
- Bumper graphic
- Service-body compartment
- Box-truck panel
- Trailer section
- Small planned overlay or inlay
Each area still requires inspection.
When a Larger Section Should Be Replaced
Replacing a larger graphic area may be the better choice when:
- The original wrap has noticeable fading
- Damage crosses two or more panels
- One repaired panel would sit beside a highly visible solid color
- The laminate has lost gloss
- The original film is unavailable
- The design lacks a natural break
- Several small repairs would create multiple patch edges
- Previous repair attempts contaminated the surface
Possible larger repair sections include:
- Both side doors
- One complete vehicle side
- Rear doors as a set
- Full hood and fenders
- Complete box-truck side
- One full design band
Moving the transition to a natural body or design boundary can make the difference less noticeable.
When a Full Rewrap Makes More Sense
A complete rewrap may provide better value when:
- The existing wrap is near its planned replacement date
- Multiple panels are damaged
- Fading is widespread
- Material is cracking or shrinking
- Edges are lifting in several areas
- The company has changed its branding
- Contact information is outdated
- The vehicle needs extensive body repair
- The original files or materials cannot be matched
- The cost of several repairs approaches the cost of replacement
- Fleet consistency is a high priority
The lowest immediate repair price is not always the lowest lifecycle cost.
A series of visible patches can reduce the professional appearance of the vehicle while delaying an unavoidable rewrap.
Collision Repair Must Come Before Wrap Repair
If the vehicle has body damage, the correct sequence is:
- Photograph the existing graphics.
- Identify the damaged wrap panels.
- Remove vinyl from the repair area.
- Complete body repair.
- Refinish the vehicle.
- Allow the paint to cure fully.
- Inspect and prepare the surface.
- Produce replacement graphics.
- Install the new wrap section.
- Document the repair.
The body shop should provide the cure requirements for the paint system.
Avery Dennison’s current application instructions state that repainted surfaces must be dry, hardened, and free of scratches. They also direct installers to contact the paint manufacturer for specific guidance regarding film application over newly painted surfaces.
See the Avery Dennison SW900 Application Instructions.
The wrap provider should not guess whether a repaired panel has cured sufficiently.
Do Not Apply New Vinyl Over an Unstable Repair
Replacement graphics should not be installed over:
- Uncured paint
- Bare metal
- Rust
- Unsealed body filler
- Peeling clear coat
- Rough primer
- Misaligned body parts
- Contaminated adhesive residue
- Damaged plastic
The new panel will follow the surface underneath it.
A quick wrap repair over unfinished bodywork may need to be removed and produced again after the proper repair is completed.
How Damaged Vinyl Is Removed
Professional removal aims to protect the vehicle and create a clean surface for the new panel.
The process may include:
- Warming the vehicle indoors
- Using controlled heat
- Pulling the film at an appropriate angle
- Working in manageable sections
- Removing adhesive residue with compatible products
- Inspecting the paint
- Cleaning the replacement area
- Confirming surface stability
Damaged film may tear more easily than intact vinyl.
Cuts, cracked laminate, overstretched areas, and collision damage can make removal slower.
The installer should avoid cutting deeply into the vehicle surface while separating the damaged section.
Can Heat Remove a Scratch From the Wrap?
Some specialty films can recover from very light surface marks under manufacturer-approved conditions. This should not be assumed for every printed wrap or laminate.
Heat will not repair:
- A cut through the film
- Missing vinyl
- Torn laminate
- Deep abrasion
- Distorted printed artwork
- Exposed adhesive
- Damaged paint
Applying uncontrolled heat can damage the film, laminate, ink, or vehicle.
The wrap provider should inspect the area before anyone attempts a heat-based correction.
Damage Near a Seam or Edge
A small cut near a seam can create a larger repair issue because the damaged area may affect:
- Overlap bond
- Edge finishing
- Water resistance
- Panel alignment
- Adjacent film
- Door movement
Placing a patch over a failing overlap can trap contamination without correcting the cause.
The provider may need to replace the complete upper panel or reconstruct the overlap according to the material’s installation sequence.
Damage to Perforated Window Graphics
Perforated window film and its optically clear laminate form a separate system.
Damage can affect:
- Visibility
- Water protection
- Edge stability
- Rear-window wiper contact
- Graphic alignment
- Legal sightlines
A patch can create inconsistent visibility or optical distortion.
Replacing the complete window graphic is often cleaner than placing a small patch within the driver’s view-through area.
Window replacement must follow the applicable material and vehicle-visibility requirements.
Repairing Reflective Vehicle Graphics
Reflective graphics require additional care.
A replacement piece may differ in:
- Daytime color
- Nighttime brightness
- Reflective pattern
- Orientation
- Age
- Material construction
Emergency, safety, and regulated vehicle markings may also need to meet specific standards.
A general printed-vinyl patch should not be used as a substitute for a damaged reflective marking.
The exact reflective product should be identified and the applicable requirements reviewed before repair.
Repair Costs Depend on More Than Square Footage
A small damaged area can require substantial work.
Repair cost may include:
- Vehicle inspection
- Artwork retrieval
- Template adjustment
- Color testing
- Material setup
- Printing
- Processing
- Lamination
- Minimum production waste
- Removal
- Adhesive cleanup
- Body-component disassembly
- Installation
- Final inspection
A two-square-foot repair does not necessarily cost exactly two square feet of material and labor.
The quote should identify whether the work includes:
- Vinyl removal
- Body repair
- Graphic production
- Installation
- Color-match testing
- Travel
- Vehicle cleaning
- Replacement of adjacent sections
Pixel Wraps performs graphics work but may require body and paint repairs to be completed by a qualified repair provider first.
Is Wrap Damage Covered by Warranty?
Physical damage is generally different from a material or installation defect.
Common non-warranty causes include:
- Collision
- Vandalism
- Scraping
- Loading damage
- Branch contact
- Improper washing
- Fuel or chemical exposure
- Picking at edges
- Body repair
Coverage depends on:
- Cause
- Written manufacturer terms
- Provider workmanship terms
- Vehicle insurance
- Fleet policy
- Project agreement
A claim should be documented before the damaged graphics are discarded.
For collision repairs, the vehicle owner may need to coordinate with an insurer. Pixel Wraps can provide a graphics repair estimate based on the visible scope, but the responsible insurer or policy determines coverage.
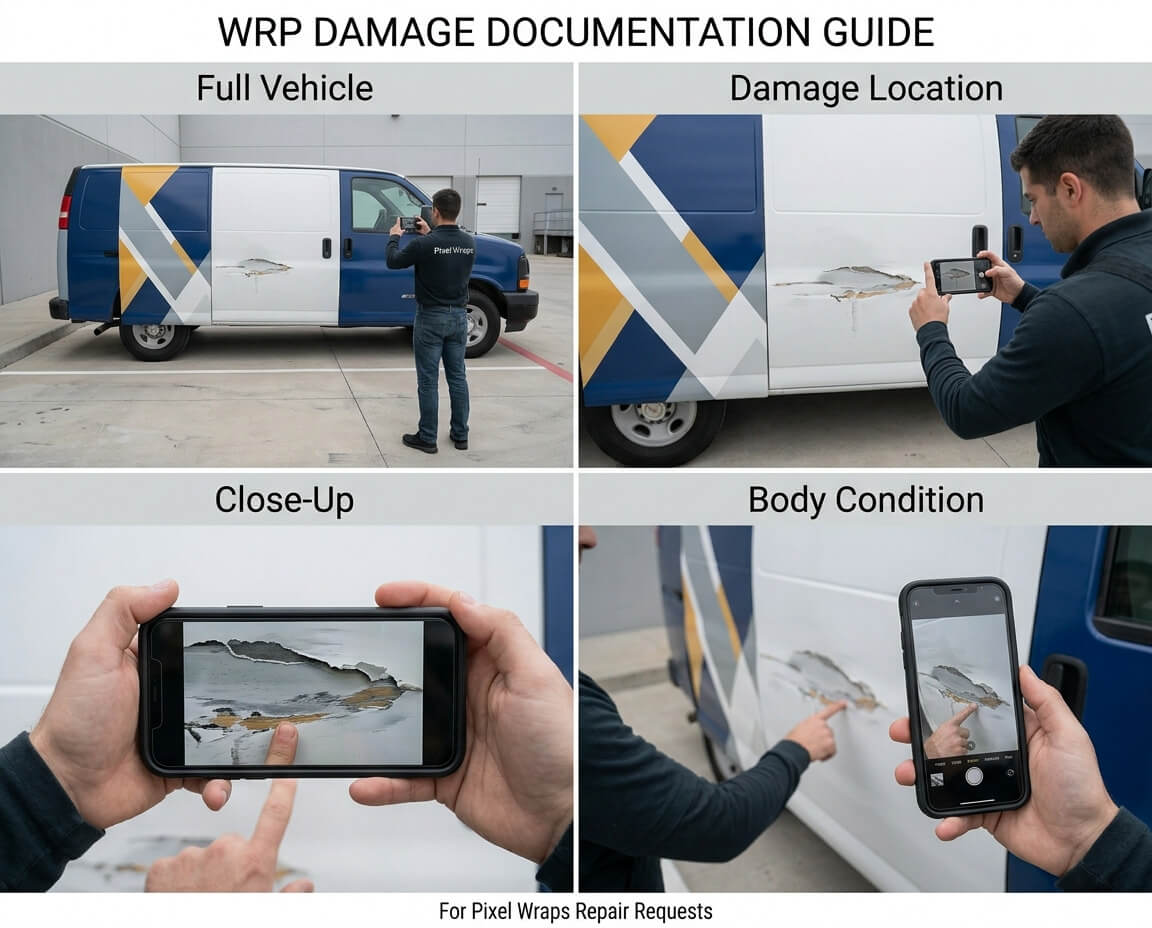
What to Do Immediately After Wrap Damage
Photograph the Vehicle
Take:
- Wide images of the complete side
- Close-ups of the damaged vinyl
- Images of body damage
- Photographs of nearby seams and edges
- Vehicle or fleet identification
Do Not Pull Loose Vinyl
Pulling can enlarge the damaged area and remove useful evidence.
Avoid Household Adhesives
Do not use super glue, construction adhesive, duct tape, or spray adhesive.
These products can contaminate the wrap and paint while making removal more difficult.
Prevent Unsafe Loose Material
If vinyl is hanging loosely enough to detach while driving, do not continue normal operation without addressing the safety issue. Contact the wrap provider for immediate guidance.
Contact the Wrap Provider
Provide:
- Installation date
- Vehicle number
- Original job information
- Cause of damage
- Body-shop status
- Photographs
- Required return-to-service date
Why Original Production Records Matter
Repair is easier when the provider has:
- Final artwork
- Vehicle template
- Panel layout
- Film product code
- Laminate product code
- Printer and profile information
- Installation date
- Material lot information
- Approved color sample
- Photographs of the original installation
Without those records, the new provider may need to:
- Rebuild artwork
- Identify materials
- Recreate panel dimensions
- Estimate color
- Produce additional tests
Fleet owners should maintain a wrap record for each vehicle.
Design the Original Wrap for Future Repairs
Repair planning should begin before the first wrap is installed.
A repair-friendly design can use:
- Natural door boundaries
- Logical graphic sections
- Controlled overlaps
- Replaceable lower panels
- Separate bumper graphics
- Replaceable high-wear overlays
- Consistent fleet panel layouts
- Important content away from likely impact zones
Avery Dennison’s wrap-training materials discuss the use of selected inlays or overlays in wear areas that can be replaced if damaged.
See the Avery Dennison Wrap Certification Study Guide.
Commercial design should consider future service, not only initial appearance.
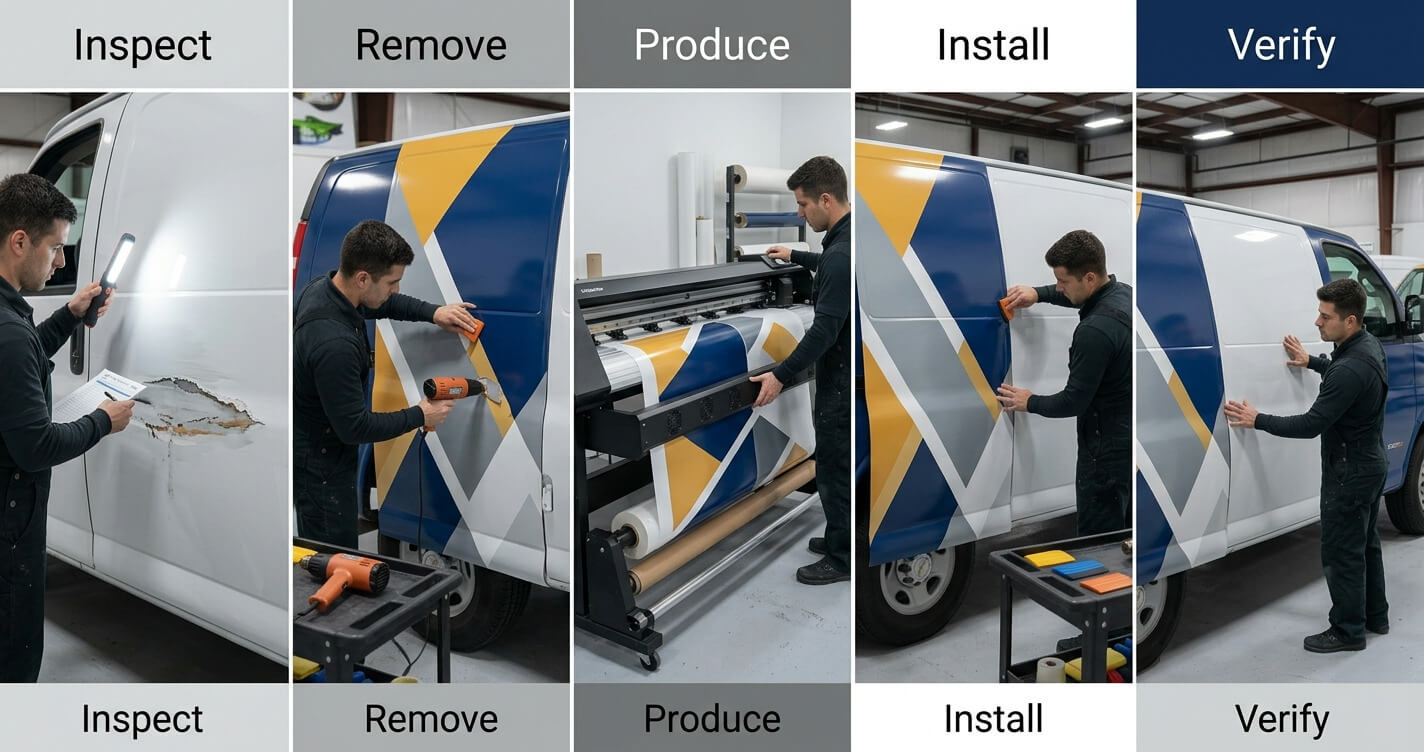
Pixel Wraps’ Wrap-Repair Process
Our repair process can include:
- Reviewing photographs and original records
- Inspecting the vehicle
- Determining whether damage affects only vinyl or the body
- Referring body or paint work when required
- Identifying the film and laminate
- Evaluating surrounding fading and gloss
- Selecting patch, panel, section, or full replacement
- Producing a printed and laminated sample when needed
- Removing damaged graphics
- Preparing the repaired surface
- Installing the replacement
- Inspecting seams, edges, and alignment
- Documenting the repair
The recommendation is based on the most practical balance of appearance, cost, remaining wrap life, and fleet consistency.
A Targeted Repair Can Extend the Wrap’s Useful Life
One damaged section does not automatically mean the entire wrap has reached the end of its service period.
A targeted repair can make sense when:
- Vehicle damage is limited
- The surrounding wrap remains presentable
- Original production records exist
- Materials can be identified
- Color variation is acceptable
- A logical panel boundary is available
A larger replacement or complete rewrap may be better when the original graphics are aged, faded, discontinued, or damaged across several areas.
The final decision should be based on an in-person inspection—not only the size of the tear.
Request a Vehicle-Wrap Repair From Pixel Wraps
If a fleet vehicle has scratched, torn, lifted, or collision-damaged graphics, send Pixel Wraps:
- Vehicle or fleet number
- Wide and close-up photographs
- Original installation date
- Cause of damage
- Body-repair status
- Required completion date
Our team can evaluate whether the project needs:
- A minor graphic correction
- A patch
- One replacement panel
- A larger graphic section
- A complete rewrap
Contact Pixel Wraps to schedule an inspection and receive a commercial vehicle-wrap repair recommendation.